
Landscape photography is an alluring and rewarding genre that allows photographers to showcase the natural world’s beauty. This comprehensive guide will help you capture awe-inspiring landscapes, from mastering your camera settings to the art of composition. You can create breathtaking images that impress you with the proper knowledge and skills.
Table of contents
- What is Landscape Photography?
- Essential Equipment for Landscape Photography
- Choosing the Perfect Location and Time
- Composition Techniques for Breathtaking Images
- Discover More:
- Mastering Camera Settings for Scenery Photos
- 10 Tips to help you improve Composition and Framing
- Essential tips for using Wide-angle lenses
- Depth of Field in Landscape photography
- Post-Processing Tips and Tricks
- FAQs
What is Landscape Photography?
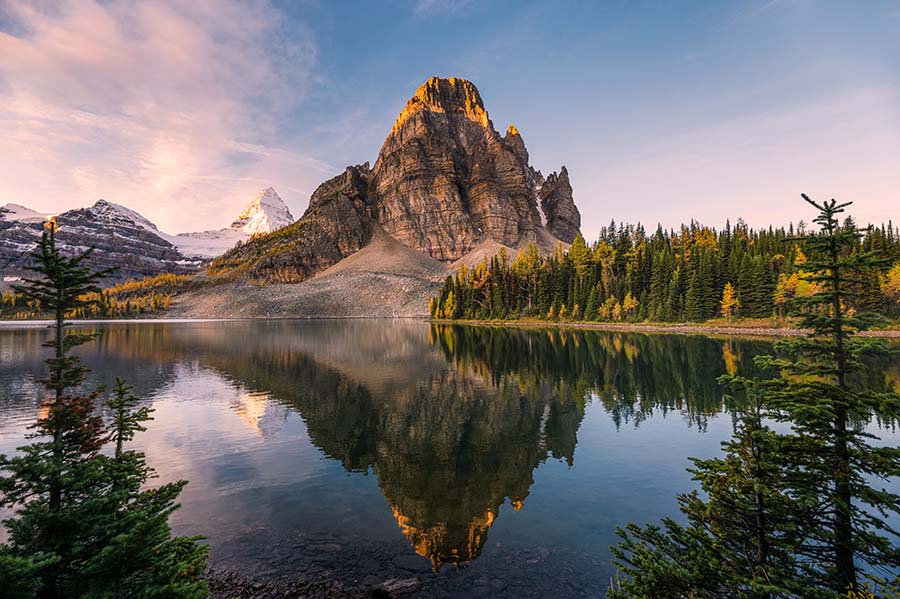
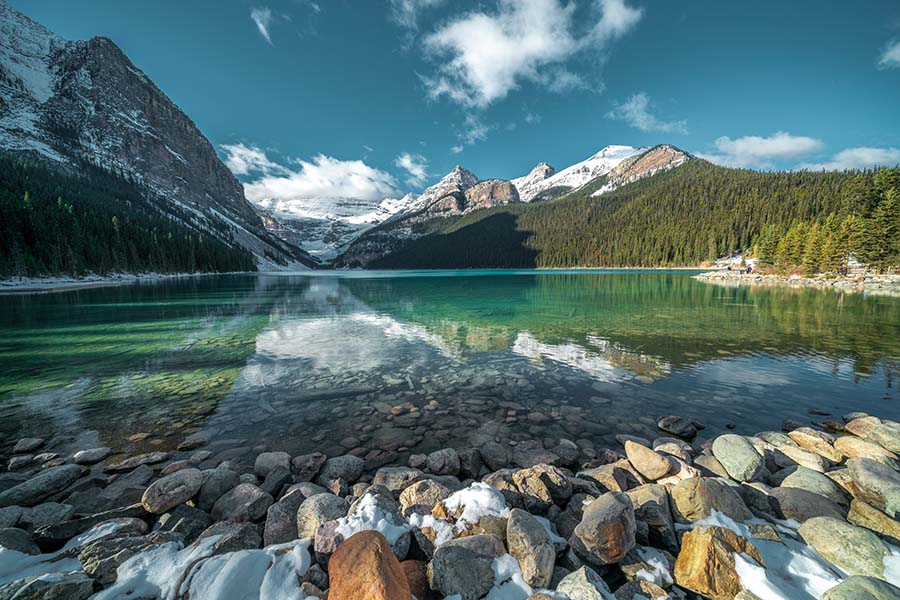
Landscape photography is a genre of photography that focuses on capturing the beauty, grandeur, and essence of the natural world. It involves photographing outdoor scenes such as mountains, forests, deserts, coastlines, and other natural landscapes. Landscape photography aims to showcase the environment’s captivating elements and evoke emotions in the viewer.
Landscape photography combines lighting, composition, and camera settings to capture and showcase the natural world’s beauty. This art form encourages photographers to explore and appreciate their surroundings, often seeking unique perspectives and breathtaking vistas.
Landscape photography can be enjoyed by professionals and hobbyists alike, with many photographers drawn to the genre for its ability to transport viewers to distant places and to convey the photographer’s connection with the environment.
Essential Equipment for Landscape Photography
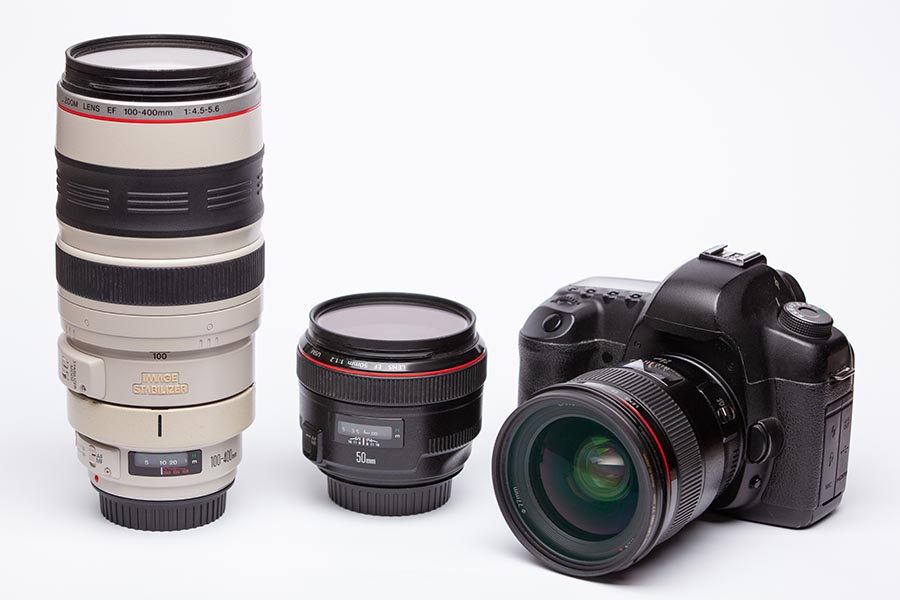
Camera
Any camera can be used for landscape photography; a DSLR or mirrorless camera provides greater control and higher image quality. When choosing a camera for landscape photography, prioritize those with a high dynamic range and a large sensor. Landscape photos can showcase the natural world’s stunning beauty with features that capture more details in different lighting conditions.
Here are some recommendations for cameras that are well-suited for landscape photography:
- Nikon D850 (DSLR): With its high-resolution 45.7-megapixel sensor, excellent dynamic range, and weather-sealed body, the Nikon D850 is a top choice for landscape photographers.
- Canon EOS 5D Mark IV (DSLR): This camera offers a 30.4-megapixel sensor, great dynamic range, and reliable performance in a durable, weather-sealed body.
- Sony a7R IV (Mirrorless): Featuring a 61-megapixel sensor, the Sony a7R IV provides exceptional image quality and resolution, making it a popular option for landscape photography.
- Fujifilm GFX 100 (Medium Format Mirrorless): The 102-megapixel sensor in the Fujifilm GFX 100 delivers unparalleled image quality and detail, ideal for large prints and professional landscape work.
- Panasonic Lumix S1R (Mirrorless): This camera offers a 47.3-megapixel sensor, excellent build quality, and robust weather sealing, making it well-suited for landscape photography.
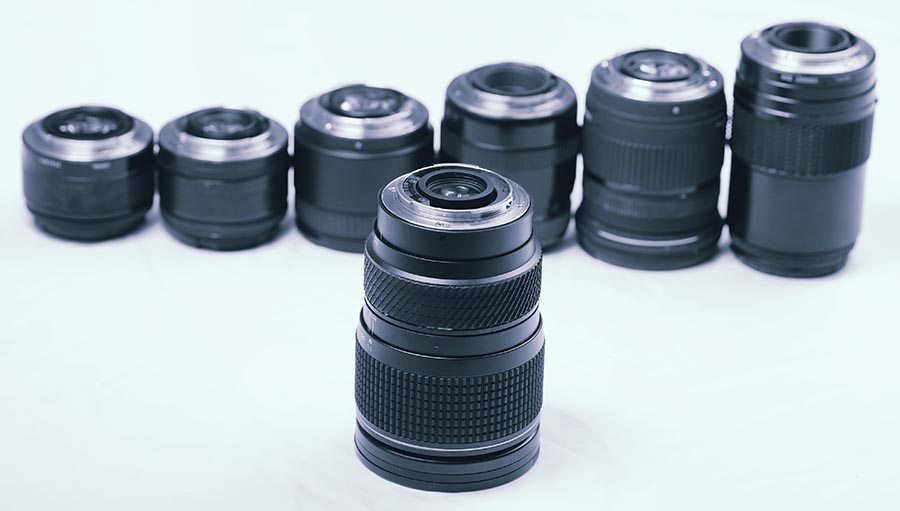
Lenses
The best lenses for landscape photography depend on the desired style, perspective, and the photographer’s budget and personal preferences. Here are some of the top lenses across various focal lengths and brands, suitable for capturing stunning landscapes:
Wide-Angle Lenses
Wide-angle lenses are commonly used in landscape photography. These lenses enable photographers to capture expansive scenes and emphasize the vastness of natural landscapes.
- Canon EF 16-35mm f/2.8L III USM: This high-quality, fast, and versatile zoom lens offers excellent sharpness and performance, ideal for Canon DSLR users.
- Nikon AF-S NIKKOR 14-24mm f/2.8G ED: This ultra-wide-angle zoom lens is known for its sharpness and minimal distortion, making it an excellent choice for Nikon DSLR users.
- Sony FE 16-35mm f/2.8 GM: Designed for Sony’s full-frame mirrorless cameras, this lens delivers outstanding image quality and performance in a compact form factor.
Standard Zoom Lenses
Standard zoom lenses offer a versatile range of focal lengths, making them suitable for various landscape scenarios.
- Canon EF 24-70mm f/2.8L II USM: This versatile, professional-grade lens provides excellent sharpness and performance across the entire zoom range, making it a favorite among Canon users.
- Nikon AF-S NIKKOR 24-70mm f/2.8E ED VR: With exceptional sharpness and built-in vibration reduction, this lens is an excellent choice for Nikon DSLR users looking for a versatile landscape lens.
- Sony FE 24-70mm f/2.8 GM: This high-quality, versatile lens is designed for Sony’s full-frame mirrorless cameras and offers outstanding image quality and performance.
Telephoto Lenses
Telephoto lenses enable photographers to isolate distant subjects or compress elements in the landscape, creating unique perspectives.
- Canon EF 70-200mm f/2.8L IS III USM: This popular telephoto zoom lens offers excellent image quality, fast autofocus, and image stabilization, making it a favorite among Canon users.
- Nikon AF-S NIKKOR 70-200mm f/2.8E FL ED VR: This professional-grade telephoto lens delivers outstanding sharpness, autofocus performance, and image stabilization for Nikon DSLR users.
- Sony FE 70-200mm f/2.8 GM OSS: Designed for Sony’s full-frame mirrorless cameras, this lens provides excellent sharpness, fast autofocus, and image stabilization for telephoto landscape photography.
It’s essential to consider factors such as image quality, weight, and weather resistance when choosing the best lens for your landscape photography needs. Additionally, the compatibility of the lens with your camera system is crucial. Invest in lenses that meet your requirements and help you achieve the desired results in your landscape images.
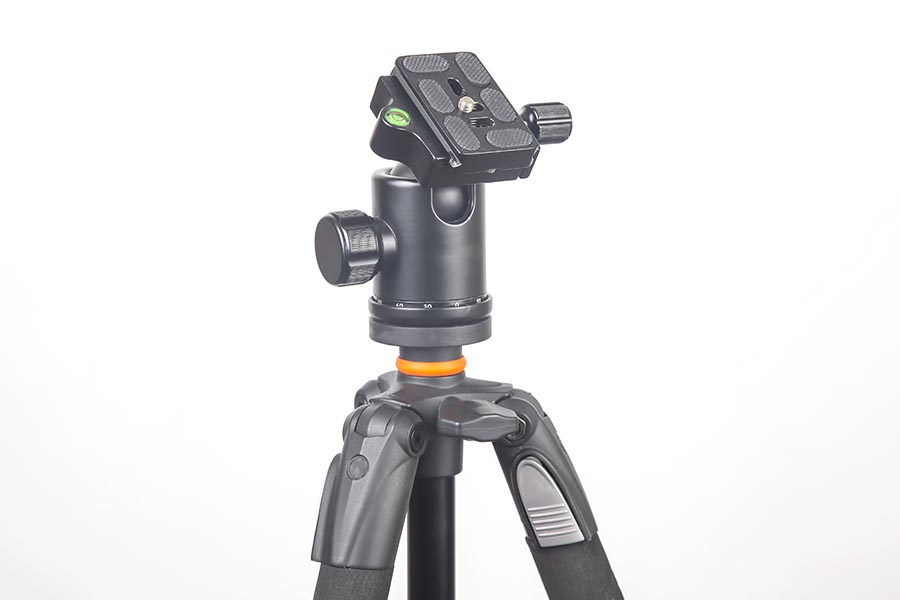
Tripod
A sturdy tripod is essential for sharp, high-quality images. It helps reduce camera shake and allows you to experiment with longer exposures and different angles.
The following are tripod recommendations that are ideal for landscape photography:
- Gitzo GT3543XLS Systematic Series 3: This carbon fiber tripod offers exceptional stability, durability, and height, making it an excellent choice for landscape photographers.
- Manfrotto MT055CXPRO3 Carbon Fiber Tripod: Lightweight and sturdy, this tripod provides reliable support for landscape photography and offers a versatile center column for unique shooting angles.
- Really Right Stuff TVC-24L: This high-quality carbon fiber tripod is known for its stability, durability, and lightweight construction, making it a favorite among landscape photographers.
- Vanguard Alta Pro 2+ 263AB100: This aluminum tripod offers great stability and versatility at a more affordable price, making it an excellent option for landscape photographers on a budget.
- Benro TMA38CL Long Series 3 Mach3 Carbon Fiber Tripod: This tripod provides stability, lightweight construction, and affordability for landscape photographers.
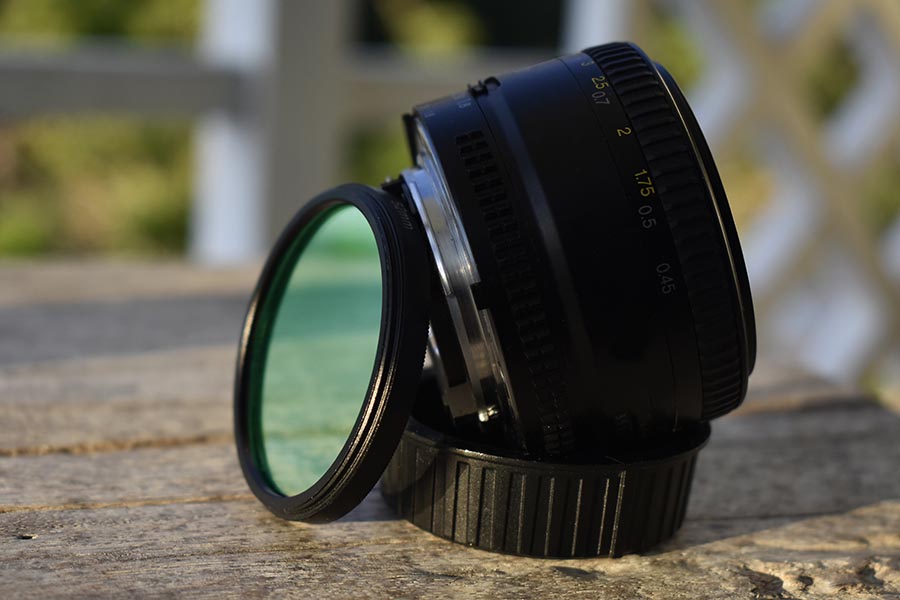
Filters
Filters can enhance your landscape images by controlling light, reducing glare, and improving color saturation. Popular choices include polarizing filters, neutral density (ND) filters, and graduated neutral density (GND) filters.
Here are some recommended filters that are perfect for landscape photography:
- Circular Polarizing Filters: These filters help reduce reflections, enhance colors, and improve contrast in landscape images. Popular brands include B+W, Hoya, and Lee Filters.
- Neutral Density (ND) Filters: ND filters allow longer exposures in bright conditions, enabling landscape photographers to capture motion blur in water or clouds. Top brands include Nisi, Lee Filters, and Breakthrough Photography.
- Graduated Neutral Density (GND) Filters: GND filters help balance the exposure between the sky and the foreground in high-contrast scenes. Some reputable brands are Lee Filters, Nisi, and Cokin.
- UV Filters: UV filters protect your lens from dust, dirt, and scratches while reducing haze in landscape images. Hoya, B+W, and Tiffen are well-regarded brands for UV filters.
When choosing the best gear for landscape photography, it’s essential to consider factors such as your budget, shooting style, and specific subjects’ specific requirements. Investing in high-quality cameras, tripods, and filters can significantly enhance your landscape photography and help you capture the beauty of the natural world.

Choosing the Perfect Location and Time
Choosing the perfect location and time is crucial in landscape photography, as it can greatly impact the mood, atmosphere, and overall success of your images. Here are some tips on how to select the right location and time for your landscape photography:
Research potential locations
Before heading out, spend time researching potential locations. Use resources like travel guides, photography websites, social media, and online forums to discover popular and lesser-known spots that offer unique photographic opportunities. Google Maps and Google Earth are excellent tools for scouting locations and getting a sense of the terrain.
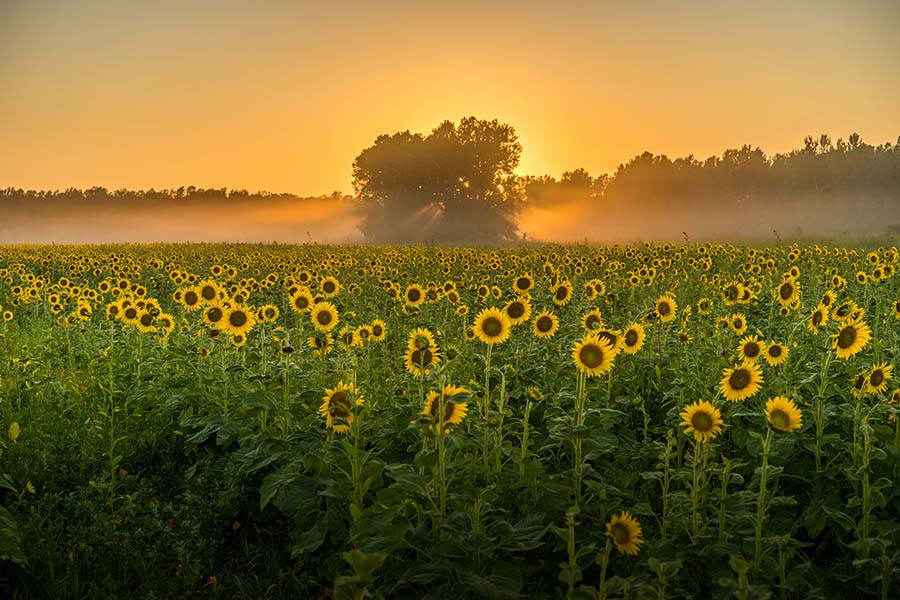
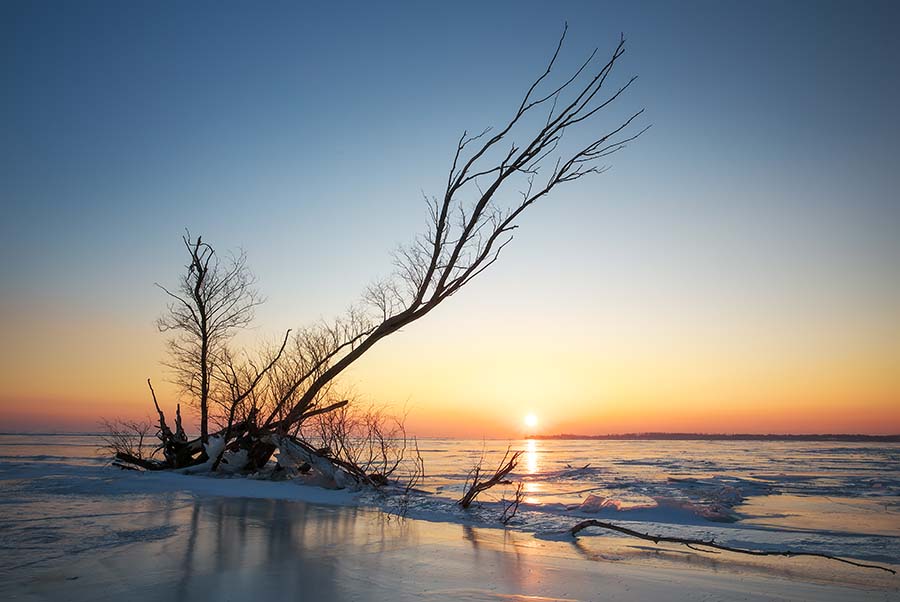
Study the light
The quality and direction of light play a significant role in landscape photography. Generally, the soft, warm light during the golden hour (the hour after sunrise and before sunset) and the cool, diffused light during the blue hour (the hour before sunrise and after sunset) are ideal for landscape photography. Use apps like PhotoPills, The Photographer’s Ephemeris, or Sun Surveyor to determine the sun’s position and the best time to shoot at your chosen location.
Consider the weather
Weather conditions can dramatically affect the mood and atmosphere of your landscape images. Keep in mind that overcast skies can create soft, even lighting, while stormy conditions can produce dramatic and moody images. Check the weather forecast before heading out, and be prepared to adapt your plans as needed.
Scout the location
If possible, visit your chosen location before your planned shoot to familiarize yourself with the area and potential scout compositions and determine the best vantage points. This will allow you to be more efficient and better prepared when it comes time to capture your images.
Be mindful of the season
The changing seasons can greatly impact the appearance and atmosphere of a landscape. Consider how seasonal factors, such as blooming flowers, autumn foliage, or snow-covered mountains, will affect your chosen location and plan your shoot accordingly.
Consider the tides
If you’re shooting coastal landscapes, be aware of the tide schedule, as it can significantly change the appearance of the scene. Use apps or websites like Tides Near Me or Tide Charts to check tide information and plan your shoot accordingly.
Timing and patience
Arrive at your location before the optimal shooting time to set up your gear and finalize your composition. Be prepared to wait for the right moment; patience is often rewarded with spectacular light and conditions.
Respect the environment
When visiting any location, be mindful of your environmental impact and follow Leave No Trace principles. Stay on designated trails, avoid disturbing wildlife, and leave the area as you found it, ensuring its preservation for future generations.
By carefully choosing the perfect location and time for your landscape photography, you’ll be able to capture stunning images that showcase the beauty, grandeur, and unique character of the natural world.
Composition Techniques for Breathtaking Images
Mastering various photo techniques is crucial for creating compelling landscape images. Here are some essential techniques to help you capture the beauty of the natural world:
Rule of Thirds
Improve your composition by dividing your frame into nine equal parts using two horizontal and two vertical lines. Position key elements of your scene along these lines or at their intersections to create a balanced and visually appealing image.
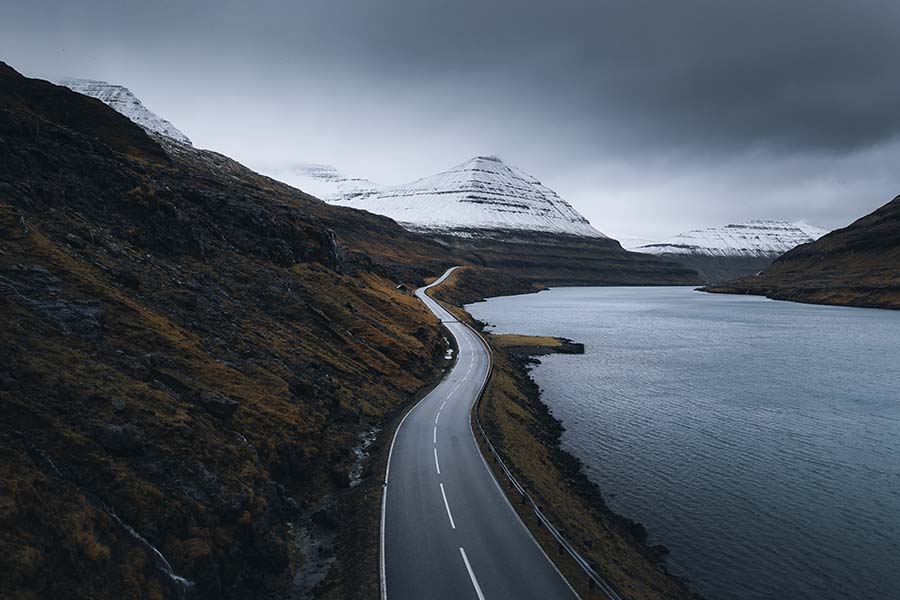
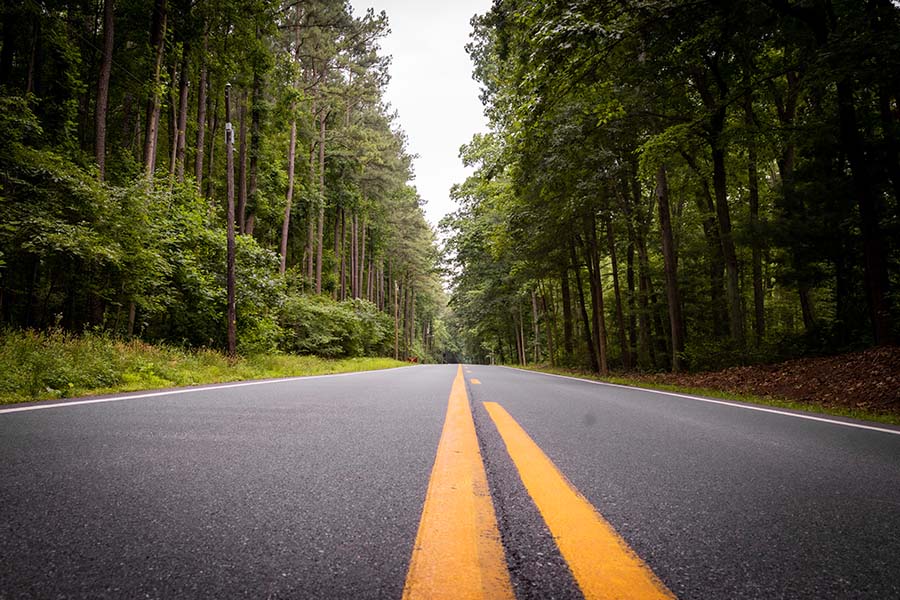
Leading Lines
Use natural or man-made elements in your scene to create leading lines that guide the viewer’s eye toward the focal point. Rivers, roads, fences, and pathways are all excellent examples of leading lines in landscape photography.
Foreground Interest
Including interesting foreground elements adds depth and a sense of scale to your images. Objects like rocks, flowers, or fallen logs can create a more engaging and immersive scene.
Framing
Use elements within your scene to create a natural border around your subject. Trees, archways, or even shadows can frame your subject, drawing the viewer’s attention to the focal point.
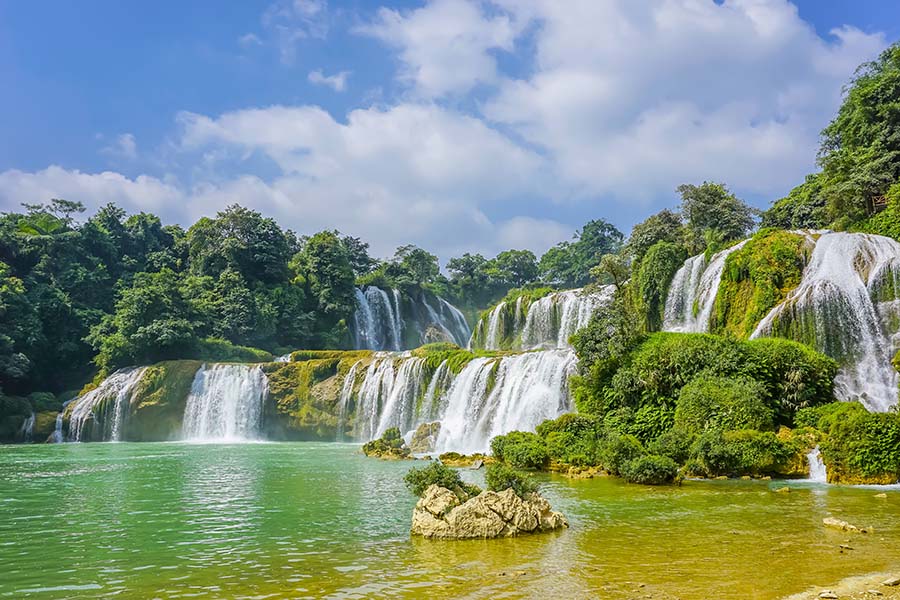
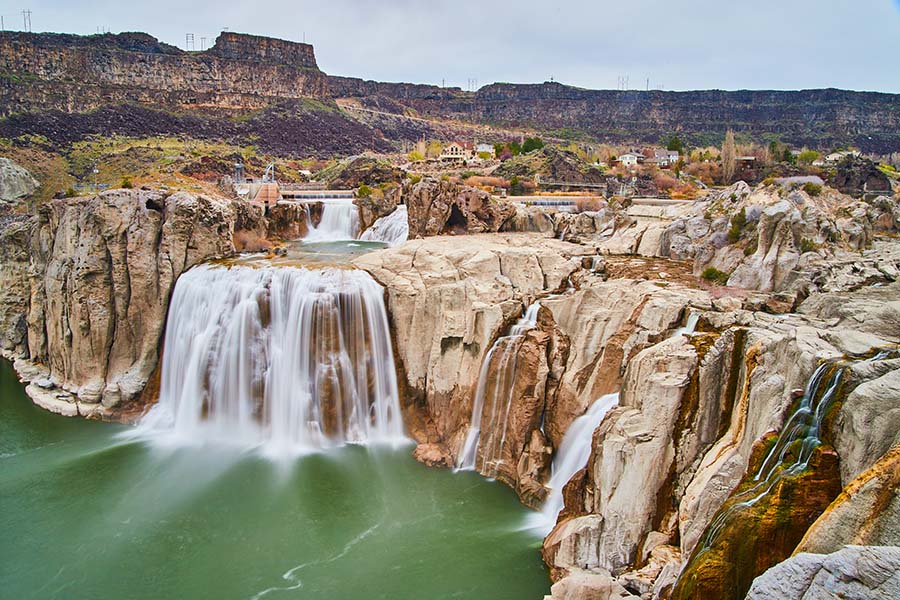
Capture Movement
Use slower shutter speeds to convey motion in your landscape images, such as the flow of water, movement of clouds, or swaying foliage. Use a tripod to ensure sharp images when working with slower shutter speeds.
Experiment with Depth of Field
Play with different aperture settings to control the depth of field in your images. A smaller aperture (higher f-number) will create a larger depth of field, keeping both the foreground and background in focus. A larger aperture (lower f-number) will isolate your subject by blurring the background.
Panoramas
Capture wide, expansive landscapes by shooting overlapping images and stitching them together in post-processing to create a stunning panorama.
Bracketing and HDR
Use exposure bracketing to capture multiple exposures of the same scene in different settings. Combine these exposures in post-processing to create an image with a high dynamic range (HDR), preserving details in the highlights and shadows.
Light Painting
In low-light situations or during the blue hour, use a flashlight or another light source to paint light onto specific areas of your landscape. This technique can add depth and interest to your images.
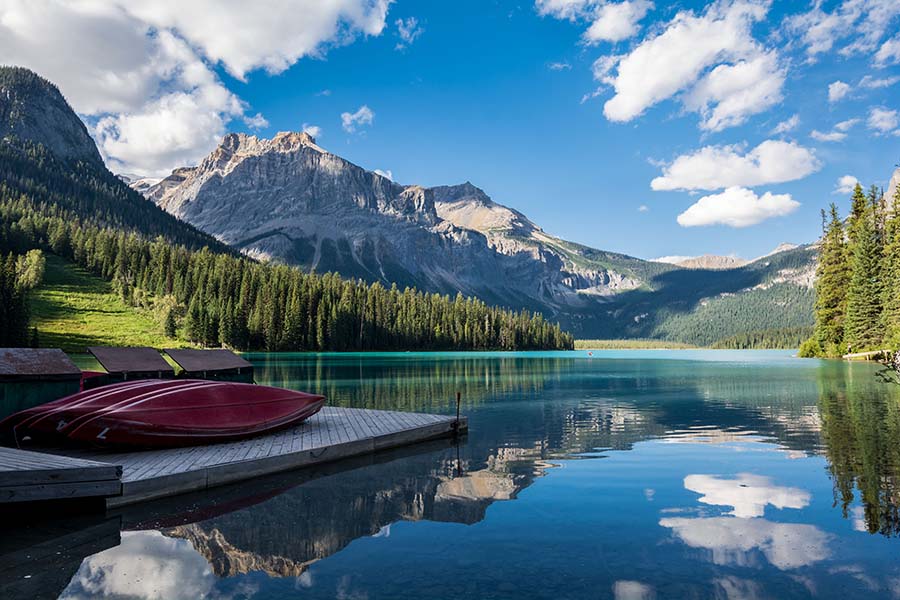
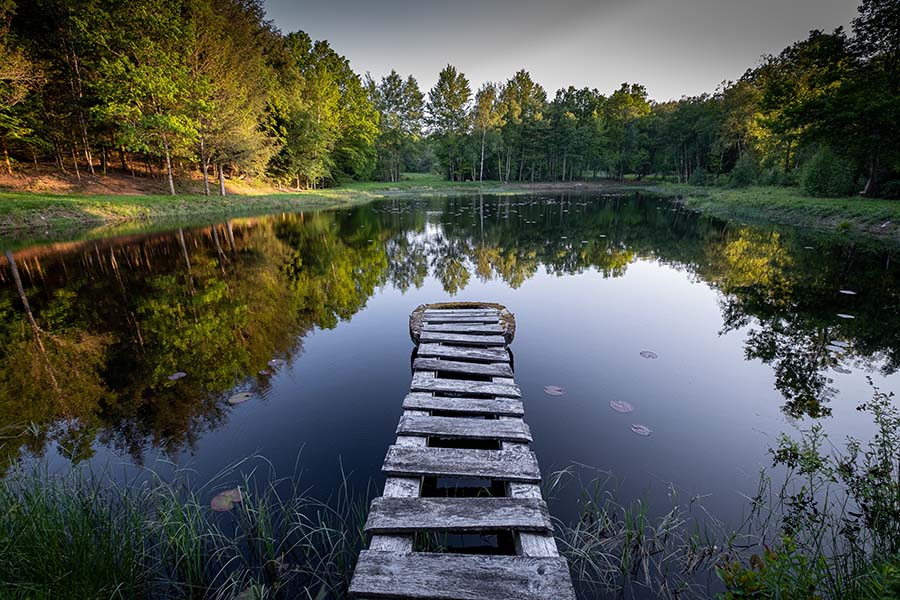
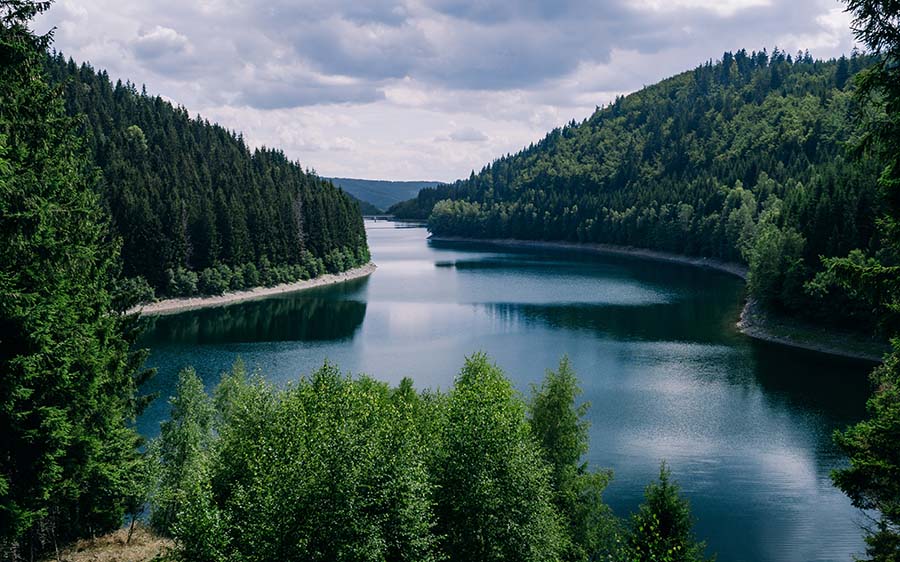
Reflections
Incorporate reflections from bodies of water, such as lakes, ponds, or puddles, to create symmetrical compositions and add a layer of visual interest to your landscape images.
Experiment with Perspectives
Change your shooting angle and perspective to create unique and captivating images. Get low to the ground, shoot from above, or find a vantage point offering an unconventional landscape view.
By mastering these photo techniques, you’ll be well-equipped to create dynamic and captivating landscape images that showcase the natural world’s beauty. It’s important to remember that experimentation is key to finding your unique style and approach. Feel free to try different methods and explore new ways to capture the essence of your surroundings.
Discover More:
Mastering Camera Settings for Scenery Photos
Understanding and mastering camera settings are crucial for achieving the best results in landscape photography. Here are key camera settings to consider when capturing the natural world:
Aperture
The aperture controls the amount of light entering the camera and affects the depth of field. For landscape photography, it’s often desirable to have a large depth of field, ensuring both the foreground and background are in focus. Use a smaller aperture (higher f-number) in the range of f/8 to f/16 to achieve this effect.
Shutter Speed
Shutter speed determines the duration the camera’s sensor is exposed to light. In landscape photography, the shutter speed affects the appearance of motion in the image. Use faster shutter speeds to freeze action or minimize camera shake when shooting handheld. For capturing motion, such as flowing water or moving clouds, use slower shutter speeds while stabilizing your camera with a tripod.
ISO
ISO controls your camera’s sensitivity to light. A lower ISO (e.g., 100 or 200) produces less noise and higher image quality. Keep the ISO low in landscape photography, especially when using a tripod. Only increase the ISO if you need a faster shutter speed in low-light conditions and cannot use a tripod.
Focus
Achieving sharp focus is essential in landscape photography. Use manual focus to ensure maximum control over your focus point, or use autofocus with the single or flexible spot focus mode to select a specific focus area. To maximize depth of field, focus on a point about one-third into the frame.

White Balance
White balance affects the color temperature of your image, ensuring accurate colors. While your camera’s auto white balance (AWB) often does a good job, you can choose a specific white balance setting, such as daylight or cloudy, depending on the lighting conditions. Alternatively, shoot in RAW format, which allows you to adjust the white balance during post-processing without losing image quality.
Exposure Compensation
Exposure compensation allows you to adjust the exposure of your image without changing the aperture or shutter speed. Use exposure compensation to fine-tune your exposure, especially when shooting in challenging lighting conditions or when your camera’s metering system struggles to calculate the correct exposure.
Metering Modes
Your camera’s metering modes determine how the camera calculates the exposure. In landscape photography, the most commonly used metering modes are evaluative/matrix (which considers the entire frame) and spot metering (which considers a specific area). Choose the metering mode that best suits your scene and lighting conditions.
Drive Mode
Consider using continuous shooting mode if you’re shooting in rapidly changing conditions, such as during sunrise or sunset. This mode allows you to capture a series of images quickly, increasing your chances of getting the perfect shot as the light changes.
By mastering these camera settings, you’ll be better equipped to capture stunning landscape images that showcase the beauty of the natural world. Moreover, it’s crucial to practice and experiment with these settings to understand how they impact your images and find the best combination for your specific scene and conditions. With consistent practice and experimentation, you can fine-tune your skills and achieve your desired results, ultimately leading to greater satisfaction with your work.
10 Tips to help you improve Composition and Framing
Layering
Incorporate multiple layers in your composition, such as foreground, midground, and background elements, to add depth and dimension to your images.
Balance
Create a visually balanced image by evenly distributing elements of interest, colors, and textures throughout the frame.
Negative Space
Utilize negative space or empty areas within your frame to emphasize your subject and create a sense of simplicity and tranquility in your landscape images.
Diagonal Lines
Incorporate diagonal lines in your composition to add energy and dynamism to your images. Diagonal lines can be created by natural elements such as mountains or man-made structures like roads.
Golden Ratio
Using the golden ratio (1.618:1) is an advanced compositional technique that creates harmony and balance in your landscape photos. To apply it, place vital elements of your scene along the golden spiral or at the intersections of golden rectangles. This approach creates a visually pleasing composition that captures the natural world’s beauty in a striking way.
Juxtaposition
Create visual interest by juxtaposing contrasting elements, such as colors, shapes, textures, or light and shadow, within your frame.
Breaking the Rules
While it’s essential to understand compositional rules, don’t be afraid to break them if it helps you create a unique and compelling image. Experiment with unconventional framing or composition to develop your artistic style.
Simplify
When composing your landscape images, eliminate any distracting elements or clutter that do not contribute to the overall story or message of your photograph.
Patterns and Textures
Look for repeating patterns or interesting textures in the landscape, and use them as the primary focus or as a complement to your main subject.
Change Your Perspective
Experiment with different shooting angles and perspectives, such as getting low to the ground, shooting from a higher vantage point, or using a drone, to create unique and captivating compositions.
Essential tips for using Wide-angle lenses
Wide-angle lenses are popular for landscape photography due to their ability to capture expansive scenes and create a sense of depth. Here are some tips on effectively using wide-angle lenses and avoiding common pitfalls:
Emphasize Foreground
Wide-angle lenses create a sense of depth by exaggerating the distance between foreground and background elements. To maximize this effect, include strong foreground interest that leads the viewer’s eye into the image.
Get Close
Don’t be afraid to get close to your foreground subject. Wide-angle lenses allow you to get close while capturing a large portion of the scene, making the foreground subject appear more prominent and engaging.
Watch Your Edges
Be mindful of the edges of your frame, as wide-angle lenses can distort elements near the edges, causing them to appear stretched or skewed. Keep key subjects away from the edges and, if necessary, correct distortion in post-processing.
Avoid Tilt
When using a wide-angle lens, avoid tilting the camera up or down, as this can result in converging vertical lines, especially in architectural or urban scenes. Keep the camera level to minimize distortion.
Keep the Horizon Straight
A crooked horizon can be especially noticeable in wide-angle landscape images. Pay close attention to the horizon line while composing your shot, and adjust it in post-processing if necessary.
Minimize Vignetting
Wide-angle lenses can sometimes cause vignetting or darkening of the corners of the image. Use lens hoods designed for your specific lens to reduce vignetting, and be aware that stacking filters can exacerbate the issue.
Watch for Flare
Wide-angle lenses are more prone to lens flare due to their large field of view. Use a lens hood and be aware of the sun’s position relative to your lens to minimize flare.
Consider Polarizing Filters
Polarizing filters can help enhance colors, reduce reflections, and improve contrast in your wide-angle landscape images. However, be aware that the effect can be uneven across a wide field of view, so use them cautiously and adjust the filter’s strength accordingly.
Practice and Experiment
Practice and experimentation are key to mastering wide-angle lenses. Spend time getting to know your lens, understanding its strengths and limitations, and trying different compositions to create stunning landscape images.
By following these tips and understanding the unique characteristics of wide-angle lenses, you can create captivating landscape images that showcase the beauty and vastness of the natural world.

Depth of Field in Landscape photography
In landscape photography, achieving a deep depth of field is often desirable, as it ensures that both the foreground and background elements in the scene are in sharp focus. To achieve this, consider the following tips:
Use a smaller aperture
Choose a smaller aperture (larger f-stop) to maximize the depth of field. Common f-stop values for landscape photography range from f/8 to f/16. Keep in mind that using an extremely small aperture (e.g., f/22) may result in diffraction, which can reduce image sharpness.
Choose the right focal length
Wide-angle lenses are often preferred in landscape photography, as they provide a greater depth of field and allow you to capture expansive scenes.
Employ hyperfocal distance
The hyperfocal distance is the point at which you should focus your lens to maximize the depth of field. Focusing at the hyperfocal distance ensures sharpness from half the distance between the camera and the hyperfocal point to infinity. Use apps like PhotoPills or DOFMaster to calculate the hyperfocal distance based on your camera, lens, and aperture settings.
Focus stacking
In situations where a single exposure cannot achieve the desired depth of field, consider using focus stacking. This technique involves capturing multiple images at different focus points and blending them in post-processing to create a final image with a greater depth of field.
Post-Processing Tips and Tricks
Post-processing is an essential step in landscape photography that allows you to refine your images and bring your creative vision to life. Here are some tips and tricks to enhance your landscape photos during post-processing:
Shoot in RAW
To have maximum flexibility in post-processing, shoot your images in RAW format. This will give you more information and greater control over exposure, white balance, and color adjustments.
Use a non-destructive workflow
Use non-destructive editing techniques, such as working with adjustment layers and masks in Adobe Photoshop or virtual copies in Lightroom, to ensure that your original image remains untouched.
Adjust exposure
Correct any exposure issues by adjusting the highlights, shadows, whites, and blacks. This can help you recover details in overexposed or underexposed areas of your image.
Enhance colors
Improve the vibrancy and balance of colors in your image by adjusting saturation and vibrance or using selective color adjustments. Be cautious not to oversaturate the colors, as it can make the image appear unnatural.
White balance
Adjust the white balance of your image to ensure accurate color representation. This can be particularly important in landscape photography, as different light sources and weather conditions can impact color temperature.
Contrast and clarity
Increase contrast to make your image more visually striking and enhance the separation between elements. Use the clarity and dehaze sliders to highlight details and reduce atmospheric haze.
Graduated and radial filters
Utilize graduated and radial filters in Lightroom or Adobe Camera Raw to apply localized adjustments to specific areas of your image, such as darkening the sky or brightening the foreground.
Sharpening and noise reduction
Apply sharpening to bring out details in your image, but be careful not to over-sharpen, as it can result in artifacts and noise. Use noise reduction tools to minimize any noise introduced during shooting or post-processing.
Remove distractions
Use tools like the Spot Healing Brush, Clone Stamp, or Content-Aware Fill in Photoshop to remove any distracting elements, such as dust spots, sensor spots, or unwanted objects in the scene.
Panorama stitching and focus stacking
For images that require multiple shots, such as panoramas or focus-stacked images, use dedicated software like Adobe Lightroom, Photoshop or specialized programs like PTGui and Helicon Focus to seamlessly merge the images.
Experiment with creative techniques
Discover different post-processing techniques, including dodging and burning, split toning, and adding textures and overlays. These methods can help you create one-of-a-kind and artistic landscape photos that stand out. Experiment with various techniques to find the perfect look for your images.
FAQs
Wide-angle lenses are popular for capturing expansive scenes, but telephoto lenses can also be useful for isolating distant subjects or compressing elements in your composition. Experiment with different lenses to find the best fit for your style and vision.
There are several types of landscape photography, each focusing on different aspects of the natural environment. Some common types include: Classic landscapes, Seascapes, Cityscapes, Abstract landscapes, Astrophotography
To start landscape photography, follow these steps:
Invest in a camera and lens, Learn about camera settings, Study composition and framing, Explore your surroundings, Learn from others
To become a landscape photographer, consider the following steps:
Develop your skills, Create a portfolio, Network and engage, Market yourself, Pursue further education, Seek opportunities
Landscape photography is a genre of fine art photography that focuses on capturing the beauty, grandeur, and essence of the natural environment. As an art style, it can encompass various approaches and techniques, including realism, abstraction, impressionism, and minimalism.
Wow. Excellent write-up
Thank you Karen 🙂