

Why Does Composition Matter?
Composition is the art of arranging elements within a photograph in a visually appealing and meaningful way. A strong composition can draw the viewer’s attention, evoke emotions, and effectively communicate the photographer’s intended message or story.
As a passionate photographer, I’ve always believed that the arrangement of elements within a frame can make or break an image. In photography, composition is the term we use to describe this crucial aspect. Mastering the art of composition can significantly elevate your photography skills, and this guide aims to provide you with a comprehensive understanding of it. Let’s delve into the captivating realm of photographic composition by taking hold of your camera.
Table of contents
- Why Does Composition Matter?
- The Rule of Thirds: A Fundamental Concept
- Leading Lines: Directing the Viewer’s Eye
- Framing: Highlighting Your Subject
- Depth of Field: Creating Depth and Focus
- Color: Utilizing Color Theory
- Balance and Symmetry: Crafting Harmonious Images
- Experimentation: Breaking the Rules
- Tips for Improving Your Photography Composition Skills
- End Note
- FAQs

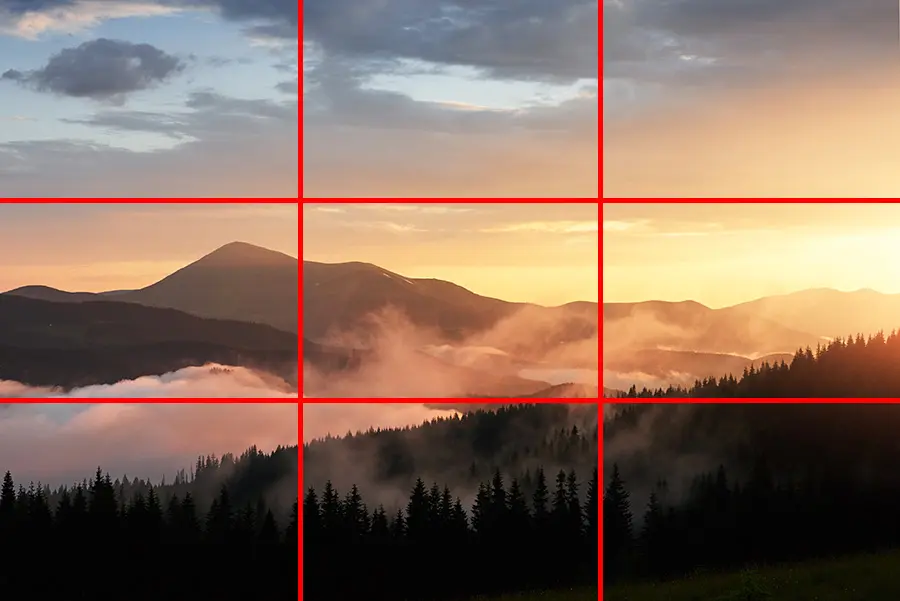
The Rule of Thirds: A Fundamental Concept
The Rule of Thirds is one of photography’s most widely known and utilized principles. It is a simple yet effective guideline to help you create visually appealing images.
What is the Rule of Thirds?
Picture dividing your frame into nine equal segments by sketching two horizontal and two vertical lines. These intersections where the lines meet are referred to as “power points.” Placing your subject at these points is deemed ideal.
How to Apply the Rule of Thirds
- Turn on the gridlines feature on your camera or smartphone. This will overlay the Rule of Thirds grid on your screen, making it easy to align your subjects.
- Place your primary subject or focal point at one of the four power points.
- Align other elements in your frame along the horizontal and vertical lines.
- Experiment with different compositions to see which one looks the best.


Applications of the Rule of Thirds in Different Genres
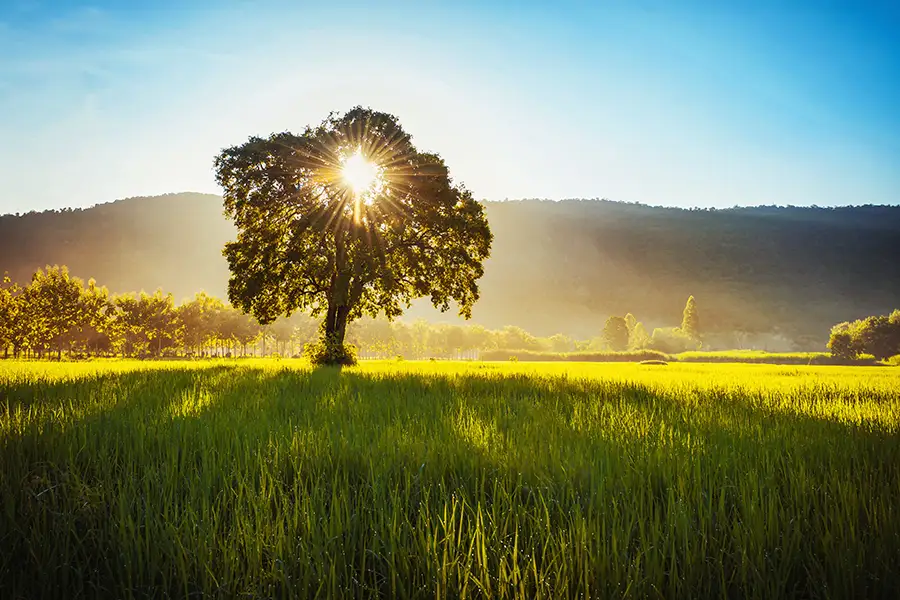
- Landscape Photography: Place the horizon along one of the horizontal lines, depending on whether you want to emphasize the sky or the ground. Position any focal points, such as trees or buildings, near the power points for added visual interest.
- Portrait Photography: Align your subject’s eyes or other prominent facial features with the power points. This can create a more engaging and dynamic portrait than placing the subject directly in the center of the frame.
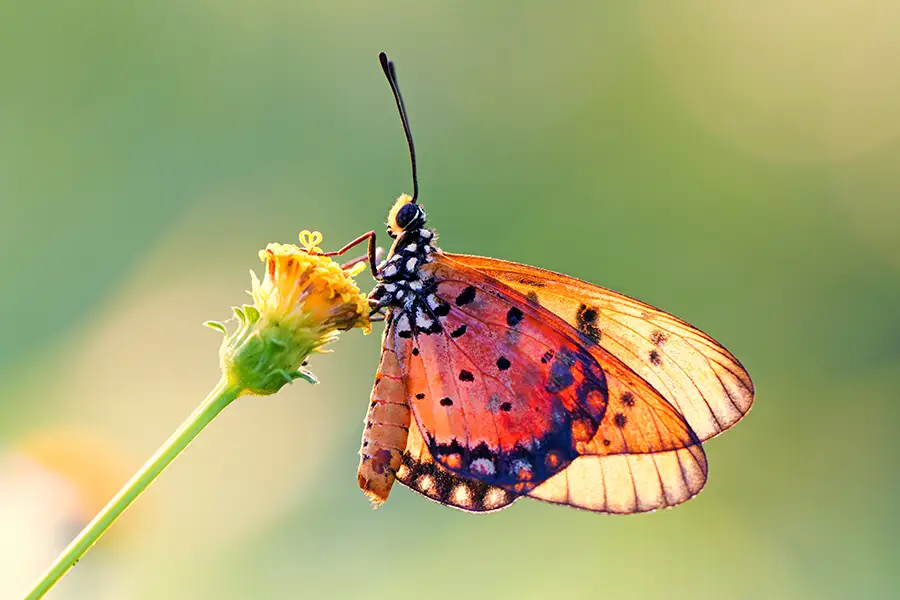
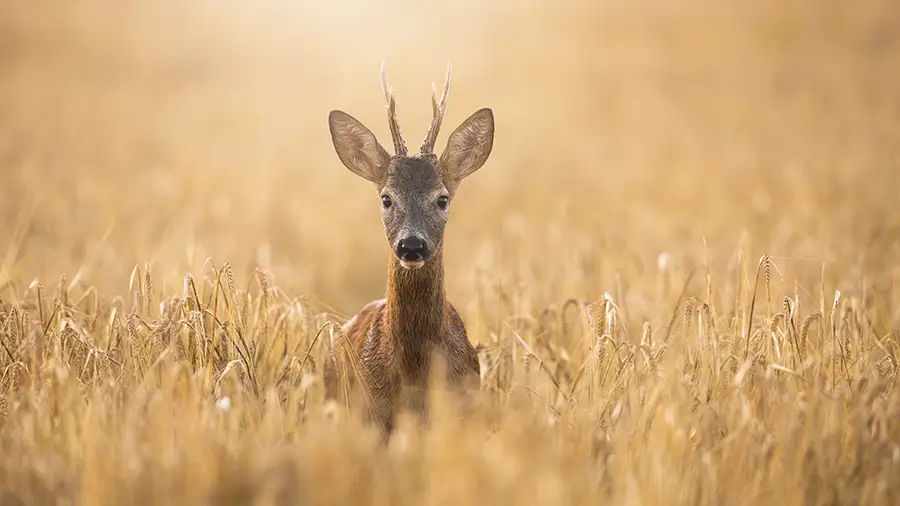
- Wildlife Photography: Position the animal’s eyes or face near one of the power points to draw the viewer’s attention to their expression and emotions. Place any other elements, such as trees or rocks, along the horizontal and vertical lines to create a balanced image.
- Street Photography: Use the Rule of Thirds to create dynamic compositions featuring people and urban landscapes. Position your subjects near the power points and align architectural elements along the grid lines.
Common Mistakes and How to Avoid Them
- Relying too heavily on the Rule of Thirds: Remember, this is just one of many composition techniques. Don’t be afraid to experiment with other methods or break the rule when appropriate.
- Forgetting about the Rule of Thirds grid: If your camera or smartphone doesn’t have a built-in grid overlay, you can still visualize the grid lines in your mind and align your subjects accordingly.
- Neglecting the background: Even if you’ve positioned your subject according to the Rule of Thirds, an overly cluttered or distracting background can still detract from the overall composition. Be mindful of the entire frame when composing your shot.

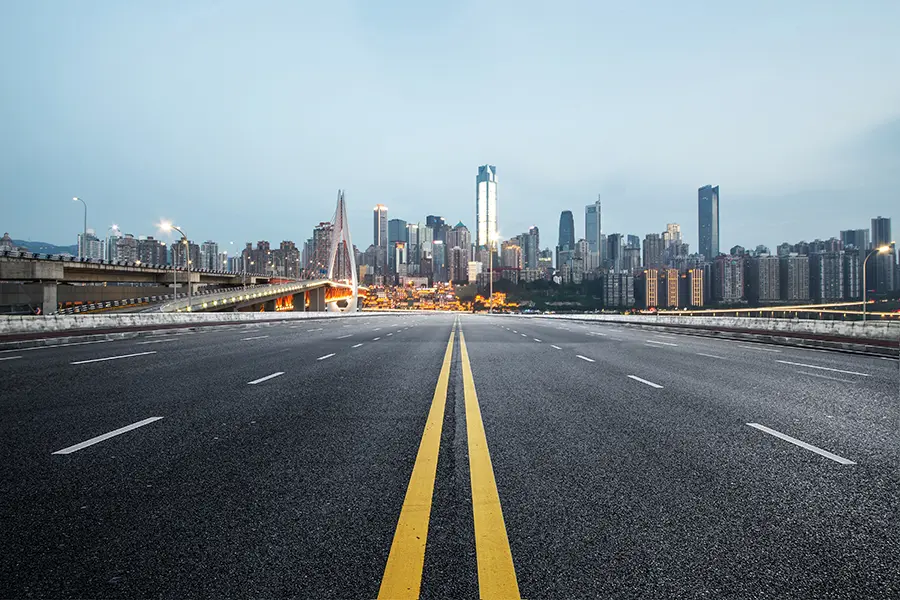
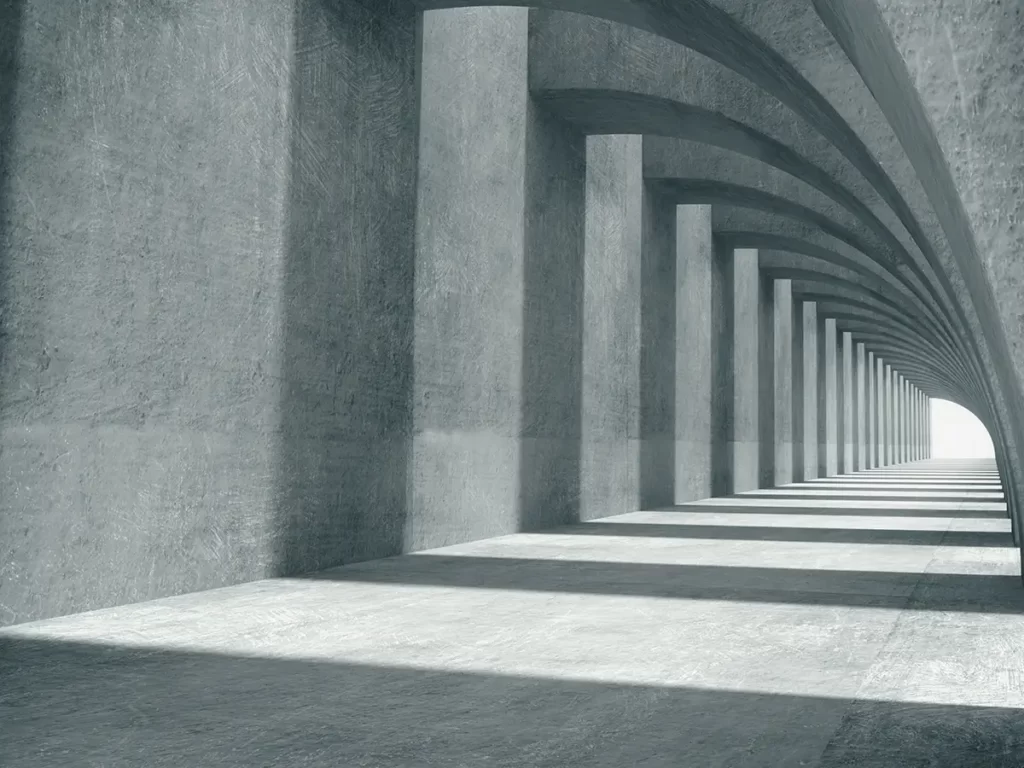
Leading Lines: Directing the Viewer’s Eye
Leading lines are a powerful tool in the photographer’s arsenal. They guide the viewer’s eye through the image, creating a visual journey that adds depth and interest.
Types of Leading Lines
- Natural Lines: These can include rivers, coastlines, and tree branches.
- Man-Made Lines: Architectural elements like roads, bridges, and buildings can serve as leading lines.
- Implied Lines: These are not physical lines but are suggested by the arrangement of elements, such as a row of people or objects.
How to Use Leading Lines Effectively
- Identify potential leading lines in your environment.
- Compose your shot so that the leading lines guide the viewer’s eye toward your main subject or focal point.
- Experiment with different angles and perspectives to make unique compositions.
Leading lines are visual paths that guide the viewer’s eye through an image, directing their attention to specific areas or focal points. They can create a sense of depth, movement, and energy, adding visual interest and complexity to your photographs.
Finding Leading Lines in Your Environment
Patterns and Textures: Repeating patterns or textures can form lines that guide the viewer’s eye through the image. Leading lines can be found in various forms, both natural and man-made. Be on the lookout for these various types of lines in your surroundings:
- Paths and Roads: These can create a strong sense of direction and movement, drawing the viewer into the scene.
- Fences and Walls: These lines can guide the viewer’s eye along the length of the fence or wall, potentially leading to a subject of interest.
- Shadows and Light: The contrast between light and shadow can create lines that direct the viewer’s attention.

Using Leading Lines to Enhance Your Images
- Emphasize your subject: Use leading lines to draw attention to your main subject, making it the image’s focal point.
- Create depth: Leading lines can create a sense of depth in a photograph, making the scene appear more three-dimensional.
- Add movement and energy: Leading lines can imply movement, suggesting dynamic energy within the image.
More to Love: Find Your Next Favorite Guide

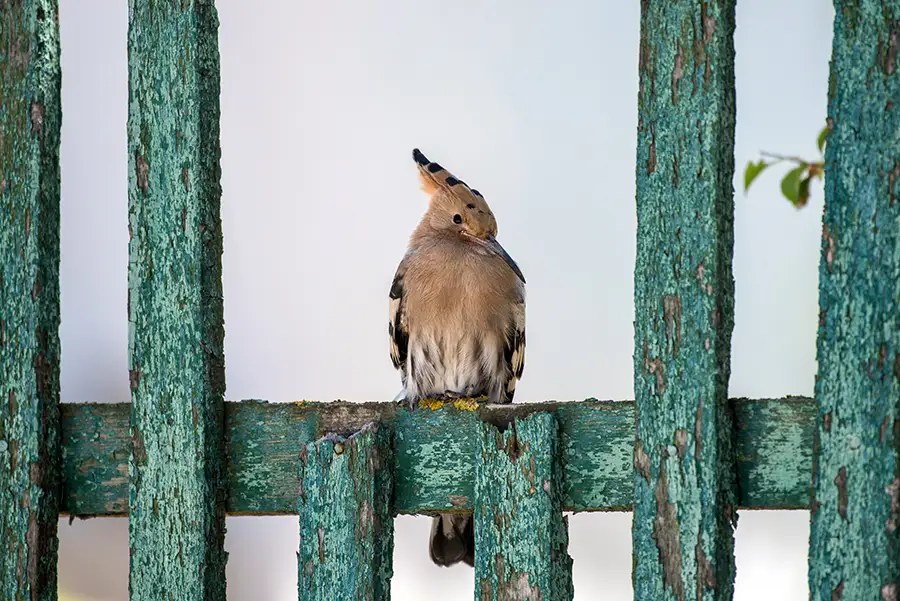
Framing: Highlighting Your Subject
Framing is a composition technique involving elements within your scene to create a natural border or frame around your subject. This can help draw attention to your subject, adding context and depth to your image.
Types of Frames
- Architectural Frames: Doorways, windows, and arches can serve as frames, providing a strong and structured border around your subject.
- Nature Frames: Trees, bushes, and other plants can create visually interesting organic frames.
- Human-Made Frames: Objects such as fences, gates, or even other people can be used as frames, adding context to your subject.
Techniques for Effective Framing
- Look for potential frames: Look for objects or elements in your environment that can serve as natural frames.
- Experiment with different frames: Try other framing elements to create unique and visually interesting images. Try out various angles and perspectives to discover the ideal frame for your subject.
- Ensure your subject is the focal point: Make sure your subject is visible and remains the focal point of the image, even when surrounded by a frame.
Depth of Field: Creating Depth and Focus
Depth of field is a powerful compositional tool that allows you to control which parts of your image are in focus and which are blurred. Altering the depth of field allows you to isolate your subject, establish a feeling of depth, and direct the viewer’s focus throughout the photograph.
Understanding How Aperture, Shutter Speed, and ISO Interact in Photography
To control the depth of field, you must understand the relationship between aperture, shutter speed, and ISO:
- Aperture: As mentioned earlier, the aperture is the opening in your camera lens that allows light to enter. A lower f-stop number corresponds to a wider aperture and a shallower depth of field, while a higher f-stop number results in a smaller aperture and a deeper depth of field.
- Shutter Speed: Shutter speed is how long the camera’s shutter is open, exposing the sensor to light. Fast shutter speeds produce sharp images with shallow depth of field, while slow shutter speeds require a deep depth of field to avoid camera shake.
- ISO: ISO is the camera’s sensitivity to light. A higher ISO setting increases the sensor’s sensitivity, allowing you to use a smaller aperture or faster shutter speed. However, a higher ISO can also introduce noise to your image, so finding the right balance is essential.
Creative Uses of Depth of Field
- Isolate your subject: Use a shallow depth of field to isolate and emphasize your subject while creating depth in the photo.
- Create a sense of depth: A deeper depth of field can make a landscape or cityscape appear more three-dimensional, with multiple layers of depth.
- Direct the viewer’s eye: By selectively blurring certain areas of your image, you can guide the viewer’s eye to the most essential parts of the photograph.
Color: Utilizing Color Theory
Color is a powerful element in photography, evoking emotions, setting the mood, and guiding the viewer’s eye. Understanding color theory can help you make intentional decisions about the colors in your images, creating more visually appealing and impactful photographs.
Color Temperature and White Balance
Different light sources have different color temperatures, which can affect the colors in your image. Adjusting your camera’s white balance settings can help you achieve accurate colors and maintain consistency in your photographs.
Creating Visual Interest with Color
- Use color contrast: Contrasting colors can draw attention to your subject and create visual interest. Look for complementary color combinations in your scene to create a strong contrast.
- Control the mood: Colors can evoke specific emotions and moods, such as warmth, calmness, or excitement. Be mindful of the colors in your scene and use them to enhance the mood you want to convey.
- Simplify your color palette: A limited color palette can sometimes create a more visually appealing image. Look for scenes with a few dominant colors, or consider converting your image to black and white for a timeless and classic look.

Balance and Symmetry: Crafting Harmonious Images
By achieving balance and symmetry in your photographs, you can create a sense of harmony that makes your images more visually appealing and enjoyable for the viewer. Specifically, balance concerns the distribution of visual weight within a photo, whereas symmetry involves replicating elements in a mirror-like fashion.
Creating Balance with Visual Weight
In photography, visual weight signifies an element’s perceived importance or prominence within an image. Factors such as size, color, contrast, and texture contribute to visual weight. To attain balance in your photos, it’s crucial to consider the visual weight of various elements and arrange them accordingly.
Using Negative Space
Negative space refers to the empty or unoccupied area surrounding your subject. By intentionally incorporating negative space into your images, you can create a sense of balance, draw attention to your subject, and add a minimalist and Clean aesthetic to your photographs.
Experimentation: Breaking the Rules
Although the principles and techniques outlined in this guide can offer a solid groundwork for good composition, it’s essential to remember that occasionally, breaking the rules can result in the most captivating images. Therefore, do not hesitate to experiment, think outside the box, and challenge conventional composition guidelines.
Ways to Experiment with Composition
- Change your perspective: Try shooting from unconventional angles or perspectives, such as low to the ground or from a high vantage point. This can create unique and interesting compositions.
- Intentionally break the rules: Experiment with placing your subject in the center of the frame or ignoring the Rule of Thirds. See how this affects the visual impact of your image.
- Play with scale and proportion: Use forced perspective or unusual juxtapositions to create surprising and intriguing compositions that challenge viewers’ expectations.

Tips for Improving Your Photography Composition Skills
- Practice: The more you shoot, the better you will become at recognizing and applying composition principles. Set aside time to practice regularly and challenge yourself with different subjects and environments.
- Study the work of others: Analyze the work of photographers you admire and identify their compositional techniques. This can help you develop your eye for composition and inspire new ideas.
- Critique your work: Review your photos and identify areas where your composition could be improved. Be honest with yourself and use this feedback to guide your future practice.
- Experiment with different focal lengths and lenses: Different lenses can significantly impact your compositions. Experimenting with various lenses can help you understand how they influence your images and expand your creative possibilities.
- Ask for feedback: Share your work with others and ask for constructive criticism. This can provide valuable insights and help you improve your composition skills.
- Keep learning: Stay curious and continue to learn about composition, photography techniques, and the work of other artists. This can help you stay inspired and constantly evolve as a photographer.
End Note
In conclusion, composition is a fundamental aspect of photography that has the power to transform ordinary images into captivating visual stories. Understanding and applying the techniques and principles outlined in this guide, such as the Rule of Thirds, leading lines, framing, depth of field, color theory, balance, symmetry, and experimentation, elevate your photography skills and create stunning images that captivate your audience.
Over time, as you hone your skills and artistic vision, you’ll uncover your distinct style and composition approach that distinguishes your work. Remember that practice is key to mastering composition; don’t be afraid to break the rules when appropriate. Persist in shooting, learning, and pushing the limits of your creative potential, and you’ll soon become a proficient and self-assured photographer.
FAQs
No, the Rule of Thirds is just one guideline to help you create visually appealing images. Feel free to experiment with different compositions to find what works best for your scene.
Practice is key. The more you shoot and analyze your images, the better you’ll become at identifying strong compositions. Studying the work of other photographers can also help you develop an eye for composition.
Different lenses can impact the way you compose your images. Wide-angle lenses can emphasize perspective and depth, while telephoto lenses can compress the scene and isolate your subject. Experimenting with various lenses can help you understand how they influence your compositions.
Yes, you can adjust your composition during post-processing, such as cropping, straightening, or changing the aspect ratio. However, it’s best to strive for strong compositions while shooting, as this will give you more flexibility and better image quality in the editing process.
A successful composition effectively conveys your intended message or emotion, captures the viewer’s attention, and creates a visual balance. Ultimately, defining a successful composition is subjective and may differ depending on individual preferences and artistic vision.